BACK ONLINE WITH THE BLOG
For anyone who was following this blog I apologise for the delay.
I was more focused on restoring than publishing. I did however
takesome pictures along the way and I will do lots of
before and after comparisons - Murray
Depending on the size and material the part is made of I use different processes to remove the original paint and corrosion etc.
Most of the sheet aluminum parts will be stripped using paint stripper or soda blasted.
I use the soda sparingly on hard to reach places after stripping or sanding. It does a great job but it uses a lot of soda and in Canada the soda is expensive and with the border to the USA closed to entry for Canadians I can't get to my regular source.


I used a paint stripper I bought at AirVenture a number of years ago named Ez Way paint remover and it really worked well on the original dope finish. It does not seem as harsh as other systems I have used and it does not have to be neutralized by water.


Ready for a coat of blue the way it was finished at the factory


These are a few of the parts I have got ready for primer or acid etch and alodine treatment before the epoxy primer.
Since my last post I have tackled cleaning up a bunch of the small parts using either my bead blast cabinet, soda blast unit or and a combination of lacquer thinner scotch brite and bead blast
If the parts are steel I just clean/strip and wash with RMI pre kleen solution and spray with the green EP-420 primer - if the material is aluminium then I strip with one of the above methods then acid etch with Boderite C-1C79 metal prep and the alodine treat with Bonderite M- CR1201 Alodine
The alodine is called a conversion coating and it is corrosion resistant after the treatment. The combination of acid etch and alodine gives the epoxy primer a surface that the primer will adhere /grip to


 |
 |
| Using the 50 series 2 part epoxy green pain |


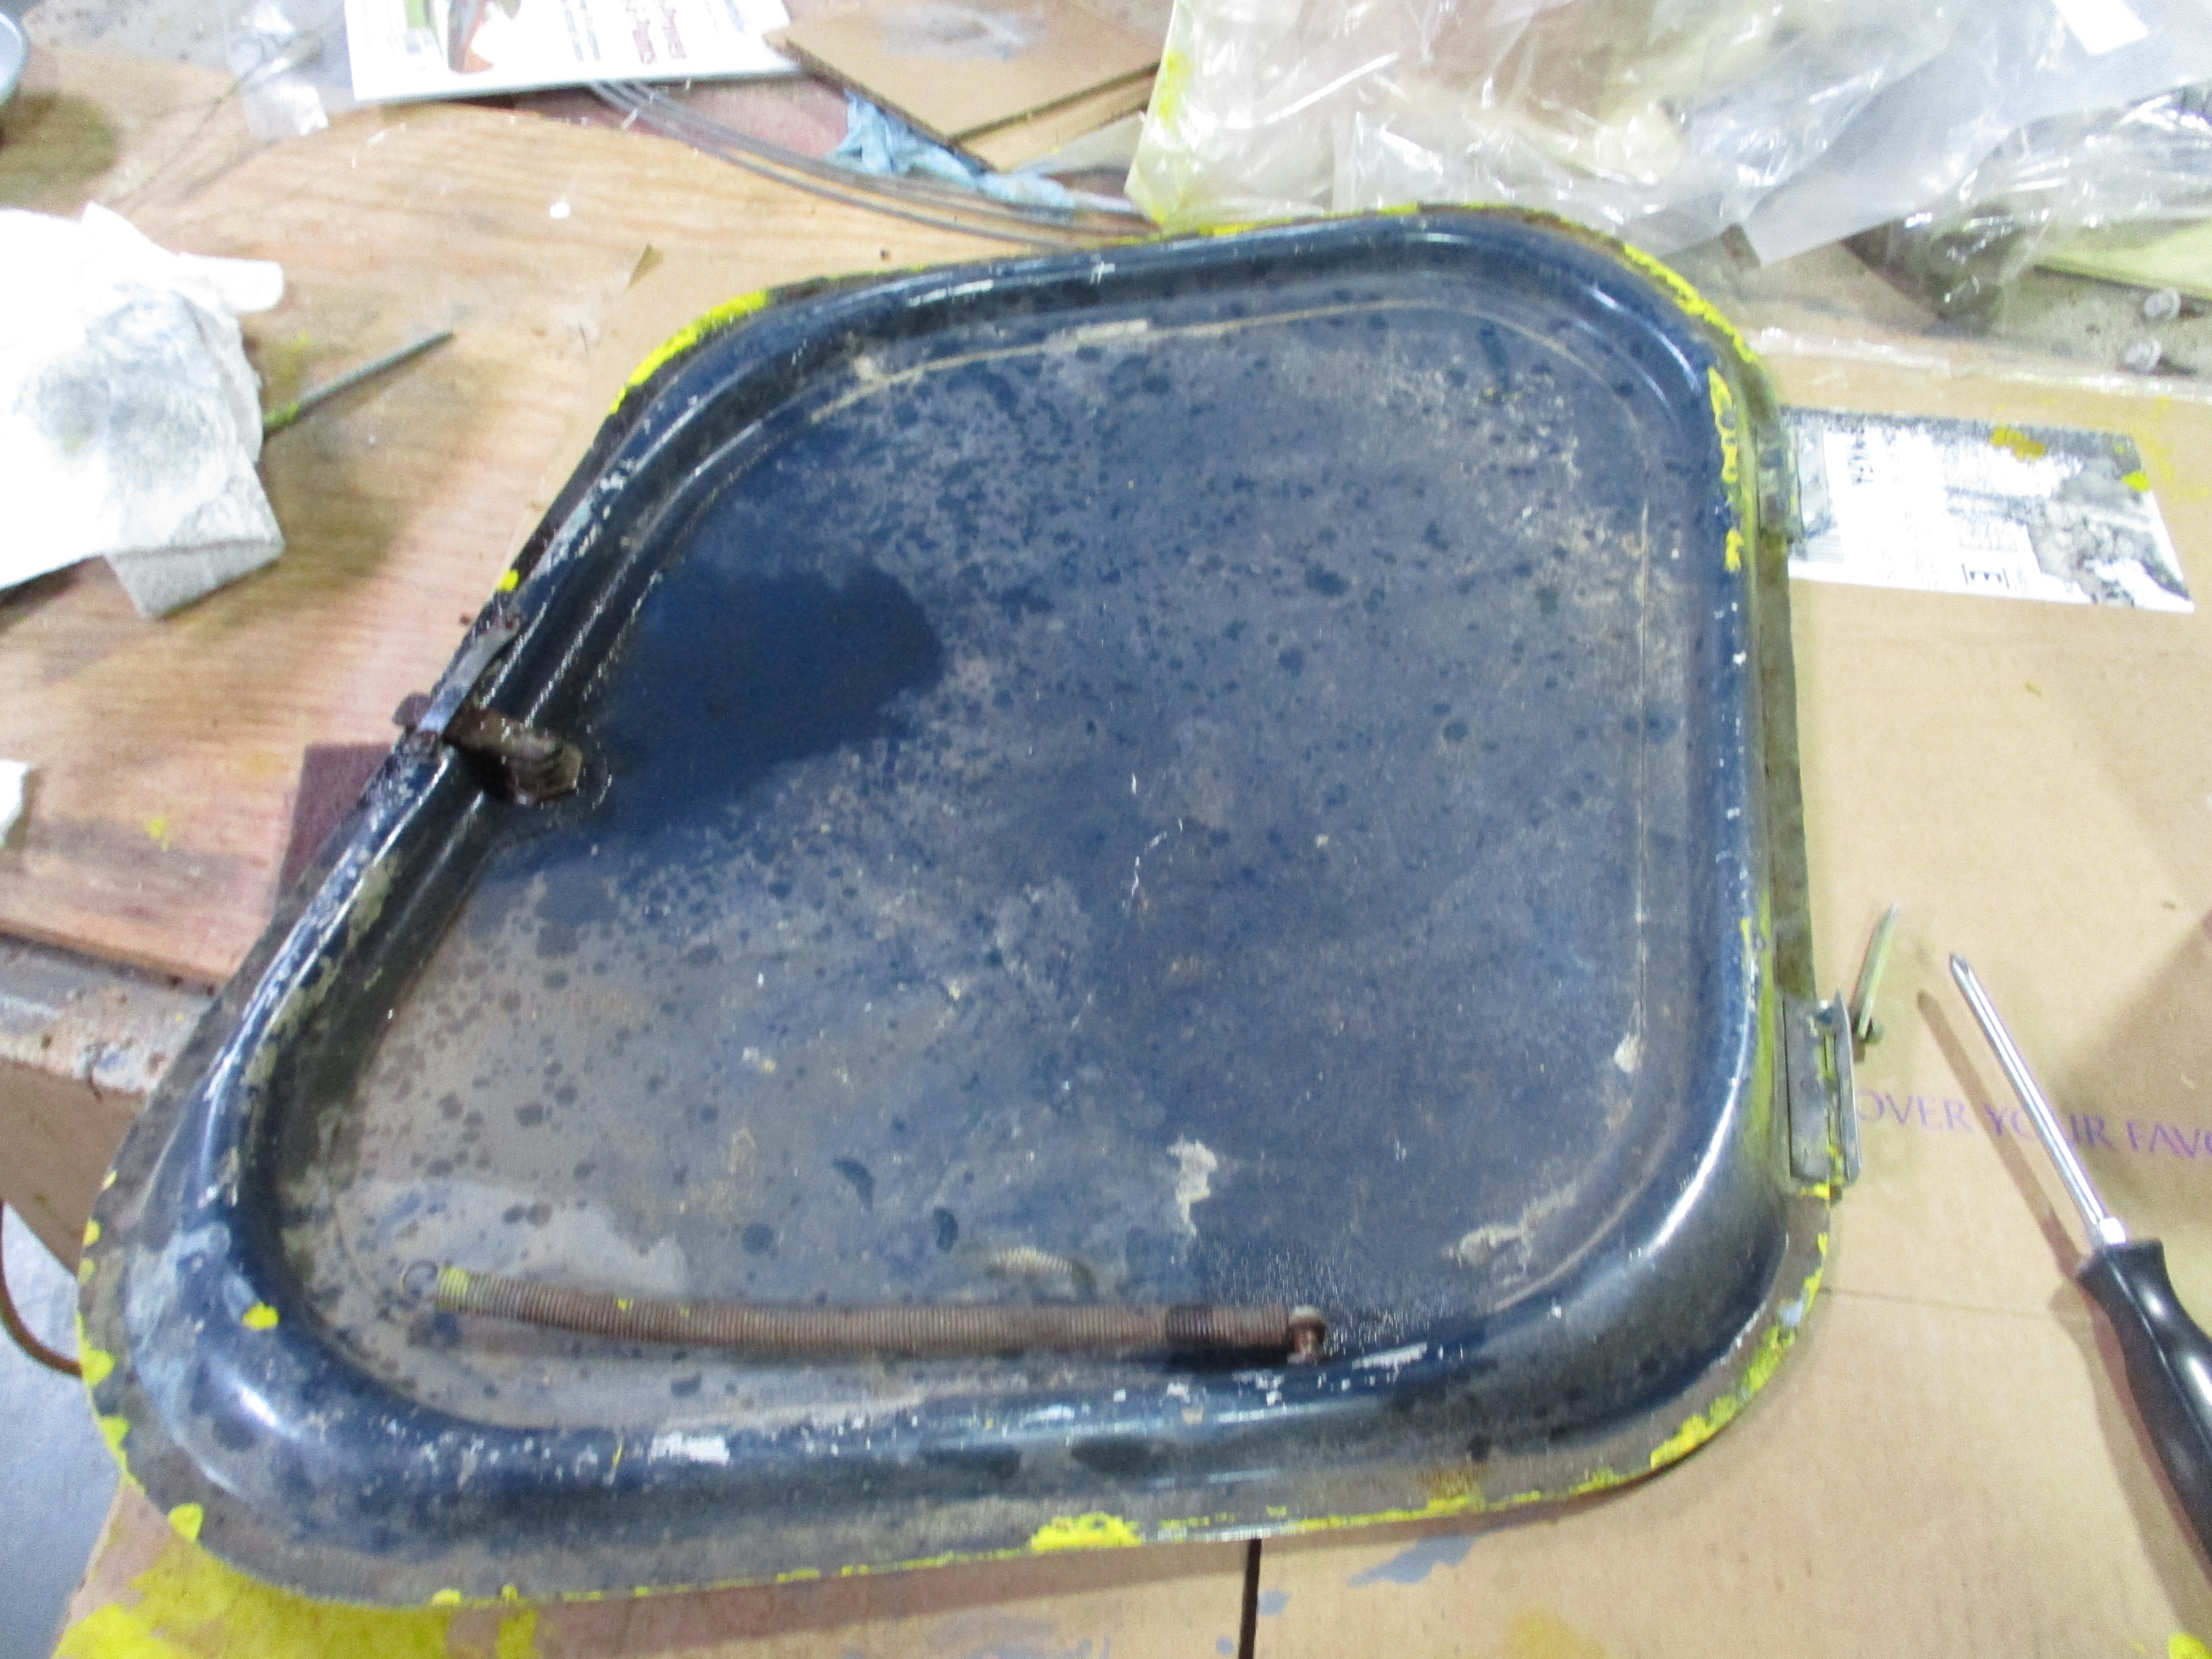
Part as removed from the fuselage


A finished part ready to install - Painted with series 50 epoxy paint
In the following posts I will try to document the restoration of the many parts that make up a Stinson 108.
I will show before and after pictures if possible and explain the processes I used to create the finished part.
There are a few different steps along the way depending on the original material of the part, the gauge of the material and coatings or level of corrosion on the part .
The metal preparation process is crucial prior to coating with an epoxy or urethane based primer and paint system.
As I wrote earlier I am using Stits EP-420 two part primer exclusively on most of the parts especially those parts that will be coated with any of the Poly Tac and MEK during the covering process.
Additionally, I am adding a coating of a light green coloured series 50 - 2 part epoxy paint on the fuselage tubing and attached parts as an extra level of corrosion protection.
Also I like clean look of the colour on the end product
The work takes a lot of time and seems to be endless but soon I know I will be running out of parts to restore and then assembly will start in earnest.
 |
This is the typical blast box from Harbor Freight in the US - or Princess Auto in Canada - they are identical except for the colour
If you buy one there are plenty of mods you can make to it that will allow it to work well.
First - you need a good source of cool dry high pressure air.
In the following picture of my compressor you will see a inter cooler I built to extract the moisture and cool the air going to all my air operated tools but especially the bead/sand/soda blasting equipment.
Second - before you use it:

The 40 lb Harbor Freight Sand Blast Pot

This is my Compressor setup with the water trap/ intercooler
It has been a while (January) since I have posted on this blog so in the next while I will try to get things up to date.
I have been working steady and have got a lot done but cleaning & bead blasting small parts, metal prepping, alodine application, priming etc is very time consuming.
To scuff a coat of primer properly on the fuselage is almost a full days work and a bit like sanding a porcupine with all the standoffs and tabs sticking out everywhere.
But perseverance pays off !
I will now document the last couple of months work.
Make sure you click read more below to see the entire entry!


I decided to unpack some parts and disassemble bead blast and get them ready to prime for paint.
Other parts will go out for powder coating or re-plating
I will do some before and after photos

Brake / rudder assembly before removal from the fuselage

Started with the rudder/brake assemble and the entry steps


the brake/rudder assembly and the steps bead blasted well and are ready to prime


I bead blasted and wire brushed the shafts - I think they will replate ok
I removed the emblems and easily peeled the brown coating off the yokes

My stepson Emmanuel who in his work life since high school has become a world class Tig welder (building nuclear power plant components in a clean room setting at a global company ) has decided to assist me in this restoration project. Seems he may have the airplane bug too.

Some of Emmanuel's handiwork in the picture above
Because the fuselage I am using in this project was in original - from factory condition and has seen no repairs. I have thought it would be a good opportunity to construct a repair jig/fixture.
This jig would be used in the future on 108 aircraft that have lower longeron, tail post, wing mount or gear mount damage, from either corrosion or ground loop damage and would maintain original mounting locations.

A new Tig unit is coming soon and will be useful on the projects going forward.
A plus is that I will get to become more proficient in tig welding.
We had to make a welding metal fab area in the hangar and the following pictures show the creation of the area in the hangar.

In 2018 I closed a hobby store business I owned and had to temporarily store the fixtures etc in the hangar. In the background on the left side you can see where we have built the welding fab area .

I decided the space under the storage rack would make a good welding fab area so I removed one level to give some head space and started to frame up for the steel lining


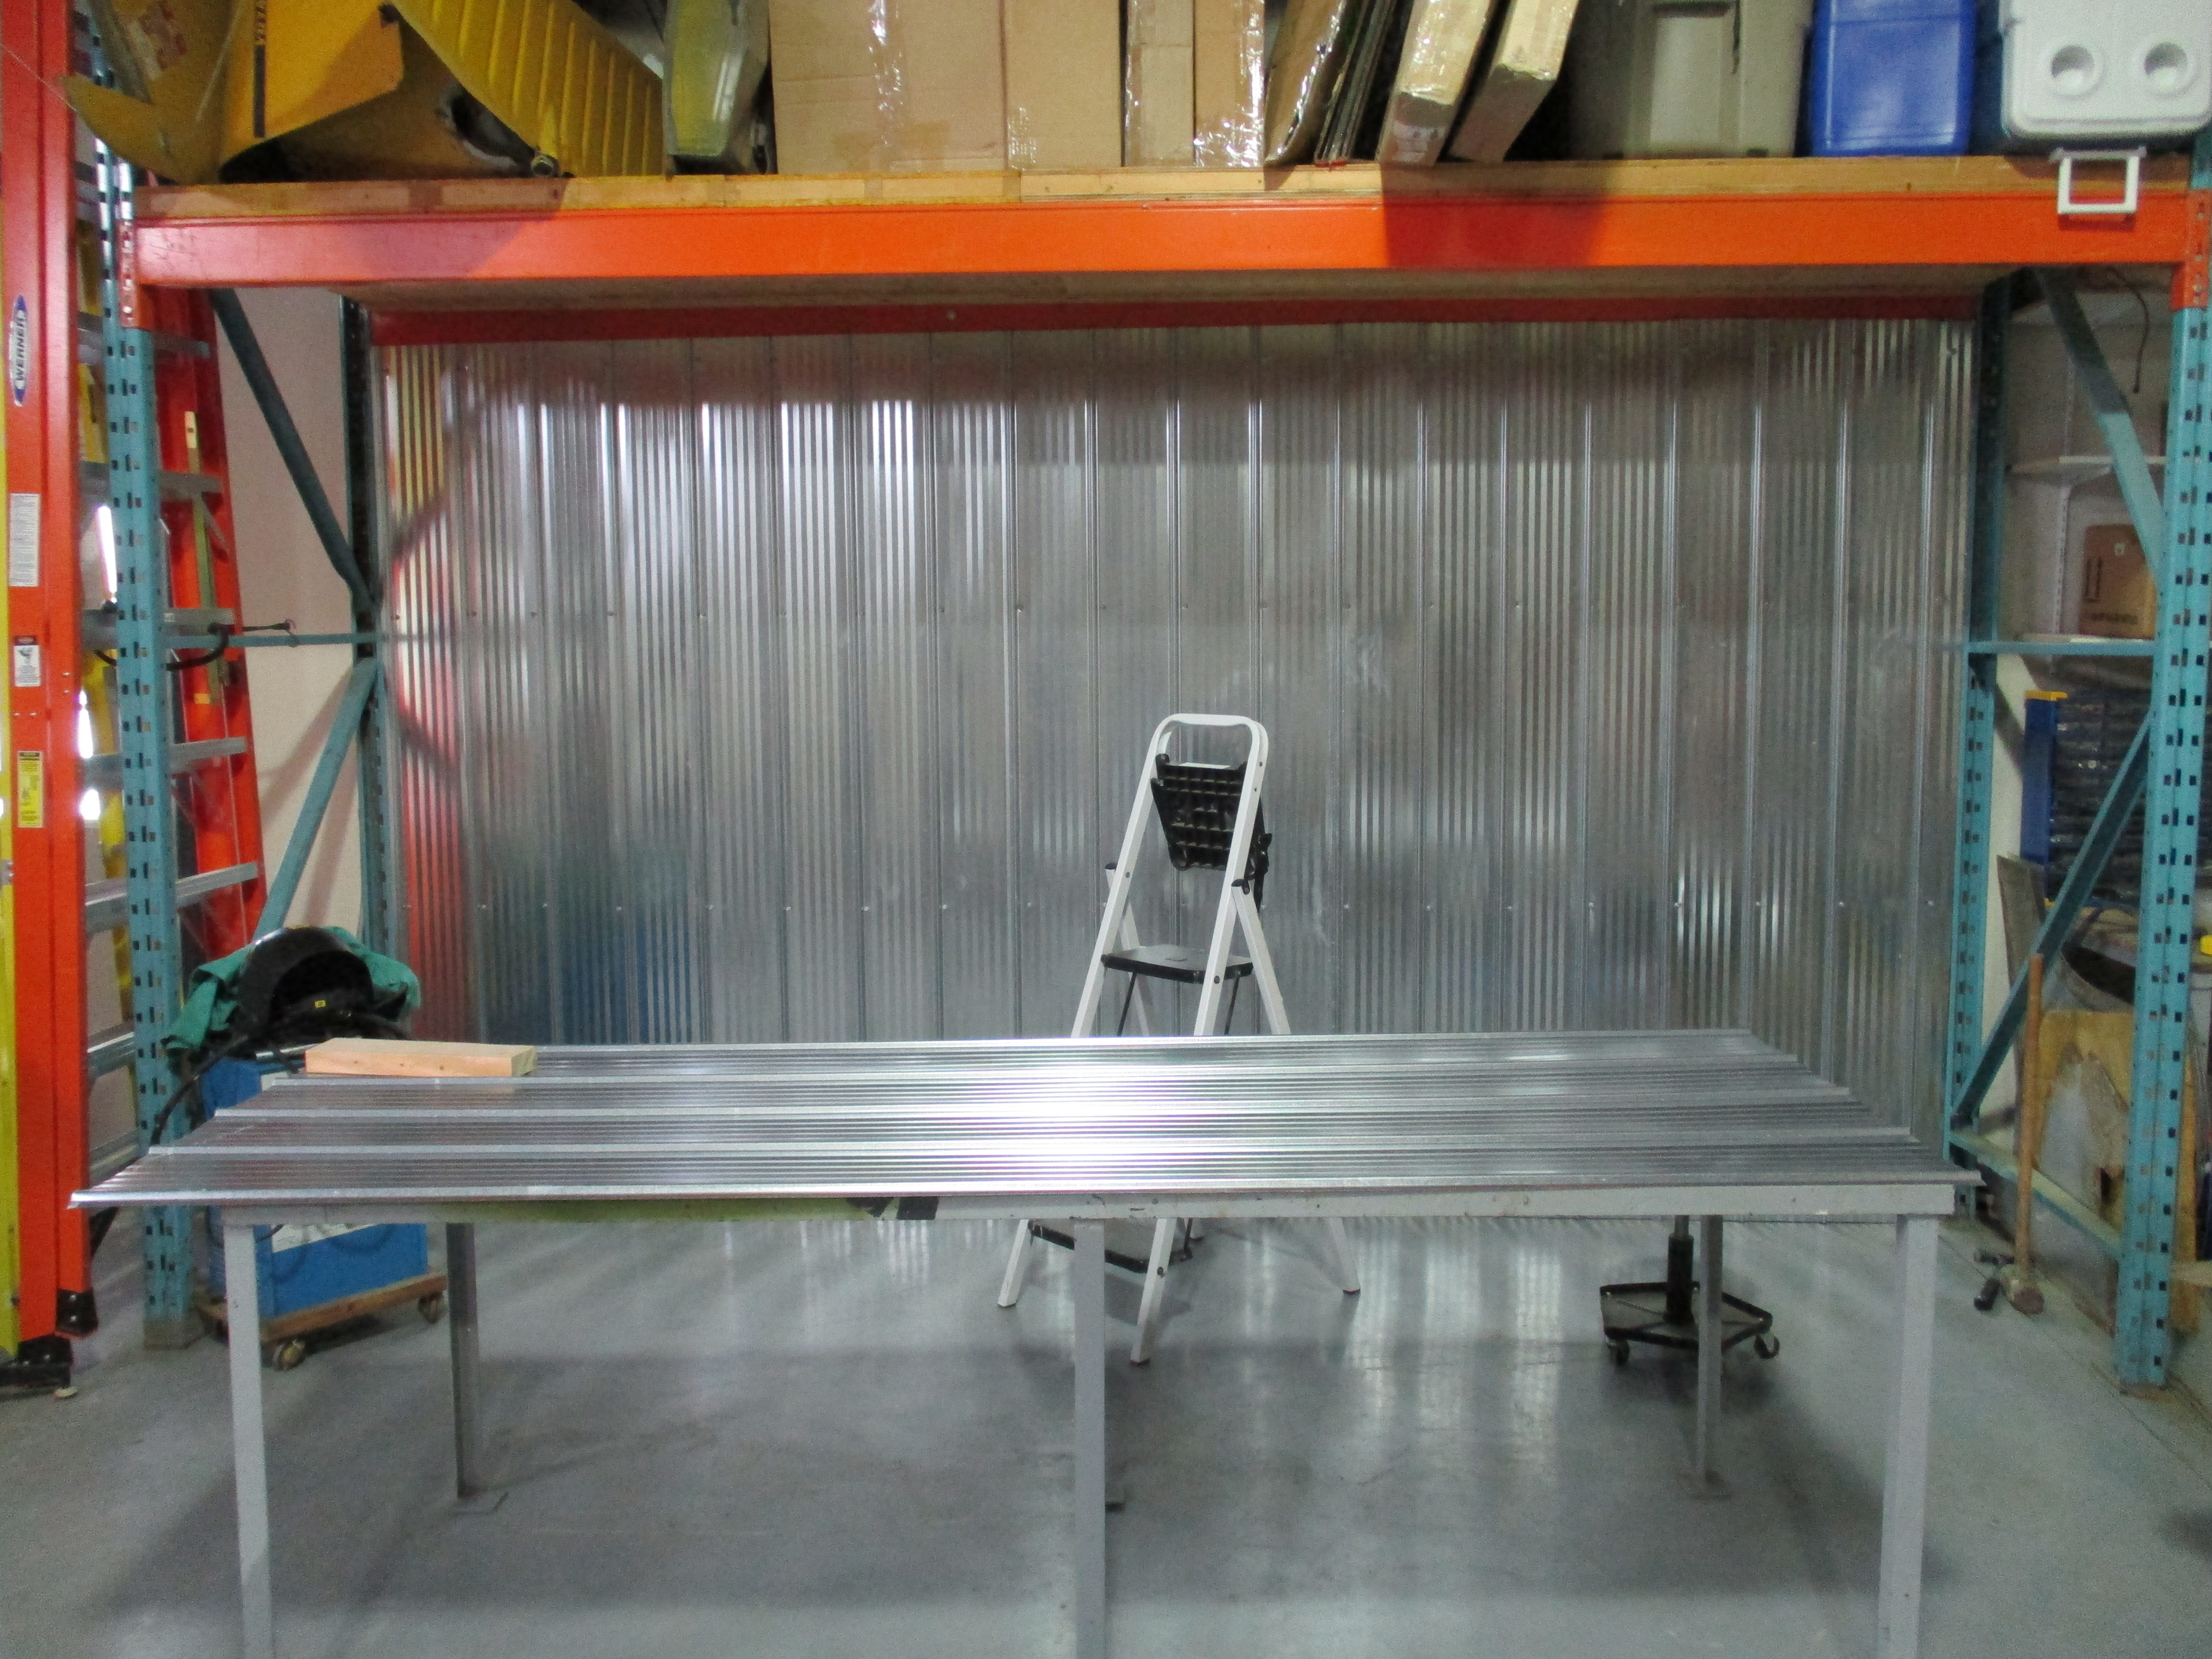


This should keep the sparks abated now its time to finish the welding table
STINSON 108 C-FYMW RESTORATION
First I want credit a man whose blog has encouraged me to proceed with the restoration of a Stinson 108.
And that is of course that is Randy Shields at Stinson 9598k restoration blog. https://stinson9598k.blogspot.com/ I have read and re-read his blog many times since I first found it online.
There are a number of others that are very helpful as well that I follow. Thanks to all the bloggers who have put in the effort because their knowledge and experience that is documented online will certainly help going forward in this project.
I hope over time my blog will be of help to someone rebuilding a Stinson 108 as well

The picture above is one of a stinson on floats I really like the looks of - especially the kids in the foreground - it must have been a wonderful summer for them.
As for the owner I am sorry for using the picture without permission.
I am sure you won't mind.
Hello to all that are following this blog. This is my first attempt at a blog so I am sure it will not be considered anywhere close to professional
My weekly schedule and workload has changed and I now have 4 days a week to devote to this project that I have looked forward to for so many years.
It is my intention to build a airplane as close to original as possible with the addition of newer safety items like shoulder harness etc.
C-FYMW Started its life as 108-655 known as a straight 108. In this rebuild we will be using most of the wings and tail units however I am replacing the fuselage with the one that came from N8500C - a 108-1 That I purchased in Lockport N.Y a few years ago. I decided to use this fuselage as it is a nice clean unit and it has a baggage compartment.
The original fuselage from C-FYMW has some corrosion issues in the lower longerons and I will use it in a home built project I have planned later - time permitting
Hence I will be rebuilding the aircraft to represent a 108-1. As a note of interest this aircraft was one of the limited number of 108's that were delivered from the factory in the orange/yellow with a blue accent stripe paint scheme.
Below is a picture of The original FYMW fuselage.I have it blasted and painted in epoxy to preserve but it needs some tubes replaced.

Below is a picture of N8500 when I acquired that air frame
 |
This airplane had what was left of an original interior and original paint. The airplane as far as I can determine from it's logs was stored for many years in Upper Michigan
I started to blast this fuse in my spare time in Nov - Dec 2020 and I got it blasted but not sprayed. Pictures from my phone - not great clarity


I ran out of good weather to spray the fuselage outside so I decided to create a spray booth in the hangar in the space under the mezzanine.
That took a few weeks to install the exhaust fan and build the walls.
I can remove 4 screws and the panels on the right end come out to allow access to roll the fuse in and out.
So the following photos are from the spray booth I created under the mezzanine in my hangar


I Finally had a few days together that I could deal with some oxidation on the fuse and hit it with some 2 part epoxy primer. I used Stits EP420. It mixed up easy and sprayed well. I used a Hobbyair fresh air system (yellow box on the corner of the workbench) with a full facemask. It works great and is a good investment as the expoxy and urethane paints with hardeners are nasty to the body. Here are some photos of the booth and the fuselage.
 |
first coat of Stits ep420 primer on YMW 's new fuselage |
Next Job On The List Brake Cylinders Here is a Goodyear master brake cylinder that was installed on sn#1500 Notice the the wire that a...


